![]() In the following tutorial animate the spider vehicle which we have assembled from a picture in the previous tutorial.
If you want to follow along you can drag this blueprint into your game.
In the following tutorial animate the spider vehicle which we have assembled from a picture in the previous tutorial.
If you want to follow along you can drag this blueprint into your game.
Creating the poses
First create some walking poses which the assembly will fade between one by one later to walk. Make sure you have assigned a master object in the mo properties of one object. Move objects by dragging them. To test your animation click play animation.

Set up the Lua script
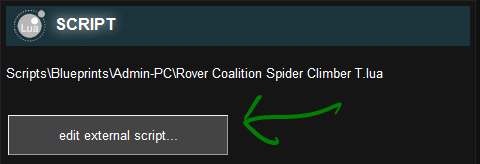
Now lets dive into the scripting. Press edit external script to open the Lua script of the Blueprint.

Set up your Lua script with the Build and Update function like here:
function Blueprint:Build()
  -- do this once when the object is created
end


function Blueprint:Update()
  --do this every frame (many times a second)
end
Register button inputs
Now setup the joints to make sure they are able to fade to poses later. In addition to that set up some function which get called by the vehicle pilot if he presses the right button.
function Blueprint:Build()
  --Do this once when the object is created

  --Setup joints
  self:JointSet(""):SetAngularSpringPower(2000)
  self:JointSet(""):SetAngularFriction(50)

  --Setup a variable to check the state of the right button
  self.right = false
  self.ControlRightPress = function(which)
    self.right = true
  end

  self.ControlRightRelease = function(which)
    self.right = false
  end
end
Setup a pose state
Now we create a table which holds all the information about the pose we added: its name, affected joints, current pose, the count of poses in total and the time to fade from one pose to the next. Make sure the joints you want to change all start with the string you set for joints (here “Leg”).
function Blueprint:Build()
  --Do this once when the object is created

  --Setup joints
  self:JointSet(""):SetAngularSpringPower(2000)
  self:JointSet(""):SetAngularFriction(50)

  --Setup a variable to check the state of the right button
  self.right = false
  self.ControlRightPress = function(which)
    self.right = true
  end

  self.ControlRightRelease = function(which)
    self.right = false
  end

  --Put all the information about the pose in a table
  self.poseanim = {}
  self.poseanim.walkRight = {
    name = "Walk Right",
    joints = "Leg",
    state = 1,
    count = 4,
    interval = 0.4
  }
end
In the update function we check if right button is pressed and then call a function which advances the pose. We define this function next. If no button is pressed all joints of the assembly will fade back to its idle pose.
function Blueprint:Update()
  --Do this every frame (many times a second)

  --Walk right if the right button is held down
  if self.right then
    self:advancePose(self.poseanim.walkRight)
  else
    self:FadeAngularSpringAnglesByPose("", "Idle 1", 0.04)
  end
end
Advancing the pose
Finally, to put everything together, we define the advancePose() function which fades from one pose to the next if the assembly is not fading to a pose.
function Blueprint:Build()
  --Do this once when the object is created

  --Setup joints
  self:JointSet(""):SetAngularSpringPower(2000)
  self:JointSet(""):SetAngularFriction(50)

  --Setup a variable to check the state of the right button
  self.right = false
  self.ControlRightPress = function(which)
    self.right = true
  end

  self.ControlRightRelease = function(which)
    self.right = false
  end

  --Put all the information about the pose in a table
  self.poseanim = {}
  self.poseanim.walkRight = {
    name = "Walk Right",
    joints = "Leg",
    state = 1,
    count = 4,
    interval = 0.4
  }

  --Advance pose to the next pose
  function self:advancePose(anim)
    --Get any joint of this group and make sure it exists and finished its pose fade
    local joint = self:GetAnyJointByName(anim.joints)
    if joint and not joint:GetAngularSpringAngleFadingNow() then

      --Advance state counter
      anim.state = anim.state + 1
      if anim.state > anim.count then
        anim.state = 1
      end

      --Advance to next pose
       local pose = anim.name.." "..anim.state
      self:FadeAngularSpringAnglesByPose(anim.joints, pose, anim.interval)

    end
  end

end


function Blueprint:Update()
  --Do this every frame (many times a second)

  --Walk right if the right button is held down
  if self.right then
    self:advancePose(self.poseanim.walkRight)
  else
    self:FadeAngularSpringAnglesByPose("", "Idle 1", 0.04)
  end
end
And that’s it. With this system established it should be fairly easy to add new additional animations to your blueprint. Don’t forget to share your creation in #pp-blueprints.
To improve the gait of this robot further an additional joint connection between the feet and legs can be added. Give it a try!
